


I can't believe how time flies so fast! Its getting dark at 5pm already! Its time to get a plan in place to protect your massive equipment investment. If you do not have a heated storage space for your chemicals and/or equipment, keep reading for some ideas that may help you save thou$and$ this winter in repairs.
First things first, why do we need to worry about this? The core of our service offering in this industry involves an extremely unmerciful natural element, H2O. Like most elements as water cools, it contracts. However, once it approaches 39.2 degrees the contraction reverses and it actually begins to expand. Once H2O reaches freezing temperature of 32 degrees, it has expanded 9% or more, WOW!
So what does this mean for us? We not only want to protect from freezing, but we ALSO need to protect agianst NEAR Freezing! Our tools and equipment have many water lines that are usually full when not in use. These same lines are designed to hold high pressure, with no room for expansion and contraction. So if the H2O in these lines begins to expand, POP! The pressure must be released from this expansion causing things to crack, split, break, and pop.
Once temperatures drop just below 40 degrees, your equipment is at high risk of damage, if you wait until 32 degrees, its TOO LATE...so what can you do?
Please read your equipment owners manuals for winterizing instructions. Some say to use washer fluid, some say RV antifreeze, some say green engine antifreeze. Without getting into the specifics of which to use, primarily because I do not want to be liable for the vast array of different mfg directions, I can not state which one to use, but certainly follow what the manufacture specifies.
Don't forget your auto fill lines, dump lines, external heaters, spotting machines, floor machines, autoscrubbers, etc. However before your next job, make sure to drain out ALL "antifreeze" chemicals prior to entering a customers work space.
Next, make up a tool with a solution line quick disconnect on one end, and an air compressor connector on the other end, and use an air compressor to blow out all the water from your tools. You will need to attach an air hose, turn on the compressor, and pull the trigger on your tool with the jets towards the floor until all water has sputtered and drained out. You can also drain you solution lines as well, the ball valves and quick connects are prone to splitting too.
Other than completely winterizing your equipment, you can opt to just keep it warm. Caution! Keep in mind potential power outages may result in temperature drop!
If using a shed or garage to store your equipment, the simple fact of wall shelter will make it much easier to keep your investment from freezing. Sometimes just a small space heater is needed. I suggest getting a heater with a digital thermostat so you can set an exact temp to maintain. On the flip side, you may need to go all out like I did when I first started cleaning in Western NY. Here is my story....
When I first started cleaning with what we call "professional equipment," I was using a portable machine out of an old Chevy Trailblazer. Temps here range from -5 to the 20's during the winter, most of the time in teens. My first winter I brought everything business related into my basement and than carried back out for each and every job, this was very time consuming. Then I got a trailer where I kept most of the tools, learned to blow them out with air after each use, and still brought my machine into my basement. Then my wife finally saw my struggles of bringing it up and down the stairs, so we opted to bring inside and leave in my office/den on the first floor. That was fun, sometimes it even sat in my living room...oh the memories.
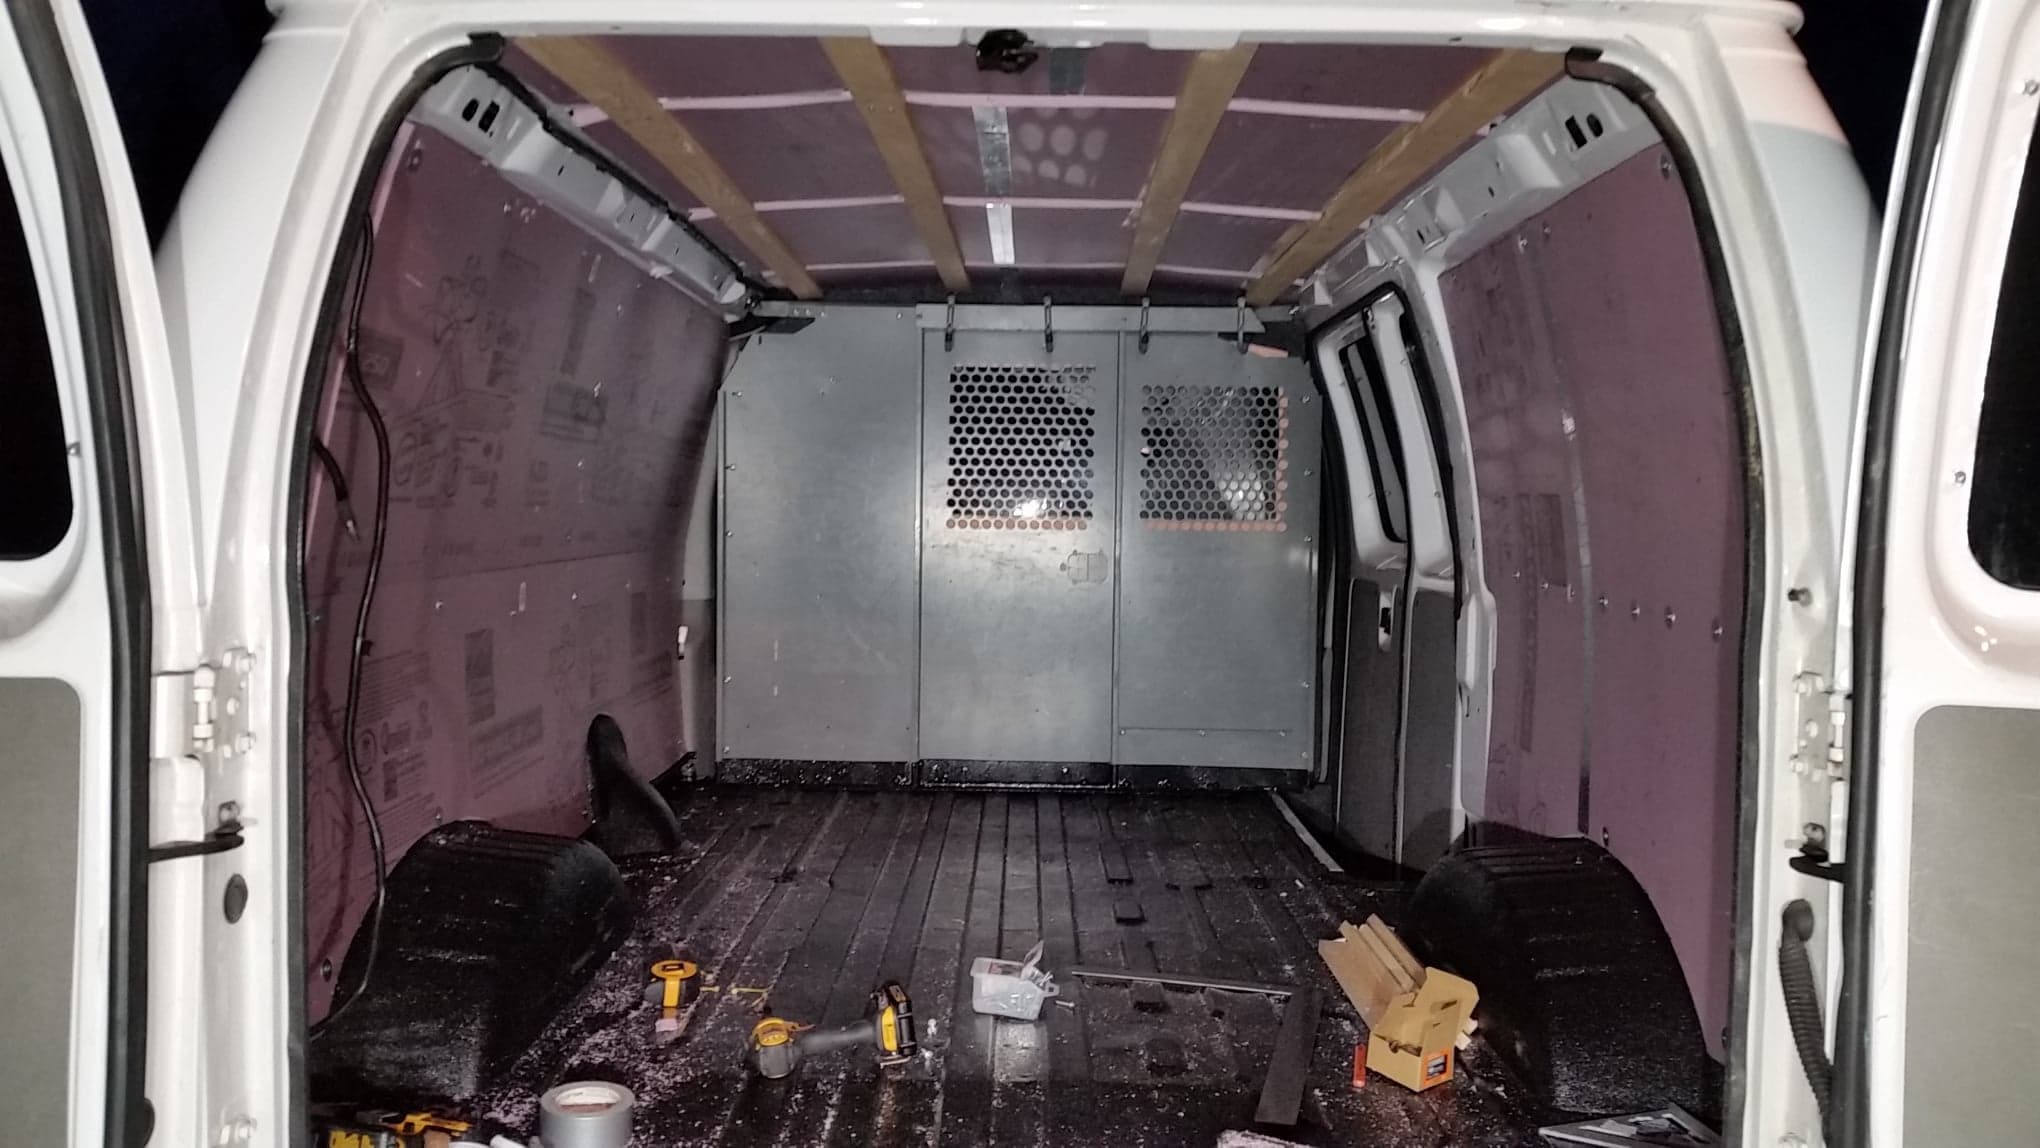
The following year I bought a van, decided to get it rhino lined, add insulation, and attempt to bring into my garage. Well that was a massive fail...my garage door was 2 inches too low for the van to fit...I began to think of a nice construction project, but decided that would be too costly for my budget. So all winter for 2 more seasons, my van sat at the top of my driveway when not in use with 2 digital thermostat space heaters and a compact air mover to circulate the heat. One was placed in the back of the van by the rear doors, and the other was placed next to my truckmount. I had to use 2 circuits, with extension cords out the back doors and into my garage. I also bought a wifi thermometer, so I could peak at my phone anywhere and know how warm it was inside my van. Since I was only cleaning part time with another full time job then, I was always paranoid of my power going out or tripping a circuit and losing heat. Fortunately that only happened once, but it happened to be fairly warm that day so the van still maintained 45+ degrees due to the insulation. Although it was quite nerve racking, I was still doing 2-3 jobs a week in the evenings and on weekends, so winterizing it was not realistic for me. As you can imagine, I began searching for a heated shop, and did eventually find one, but this is not feasable for some, especially being only a few yeas into the business. Take a look at the pictures from when I insulated my van below.
There you have it! If anyone has any more tips or tricks that may be useful to share with others, please email me at dave@cleanprosupply.com and I will add your comments. We are all here to learn from each other, so your input and your stories may hold great value to others. Enjoy!
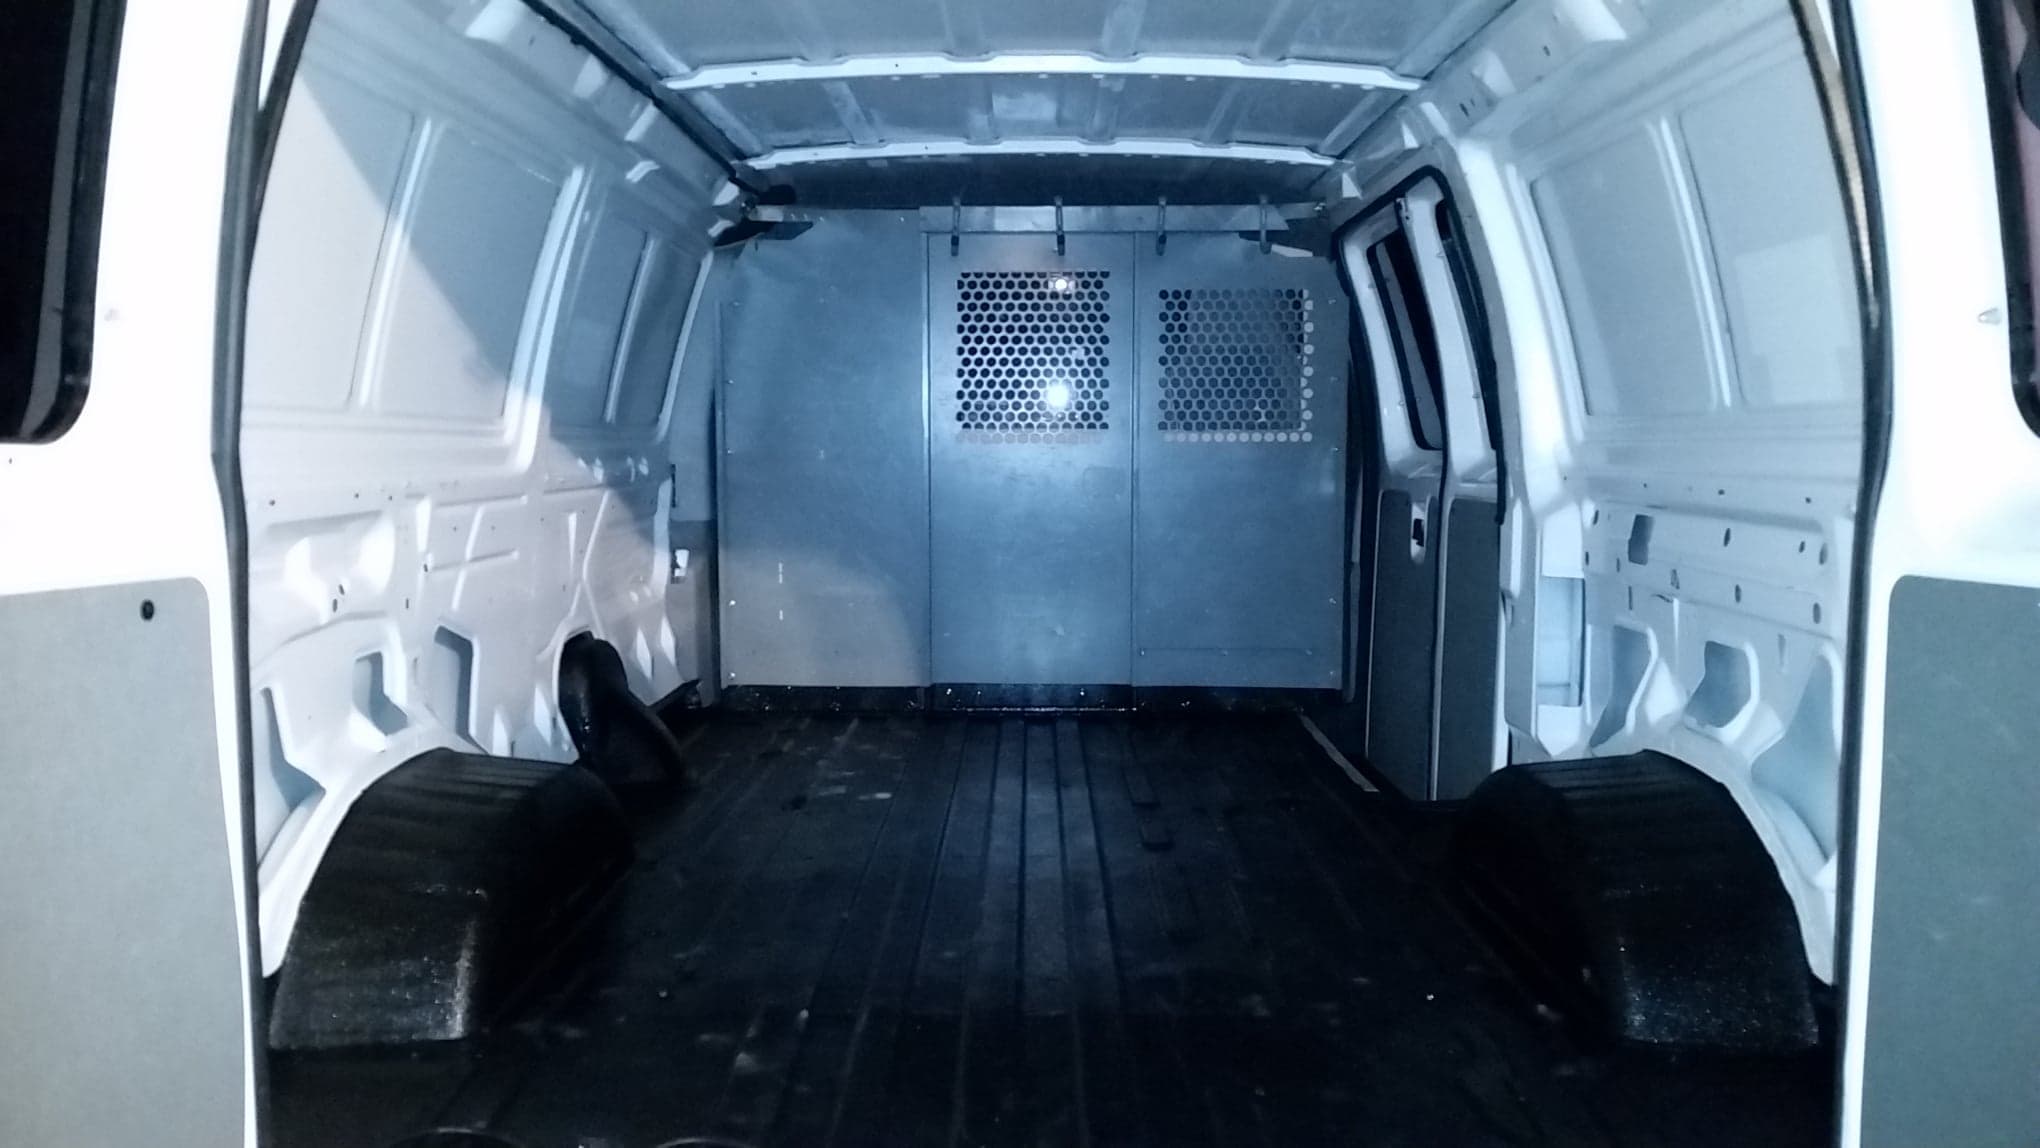
Fresh Rhino Liner.
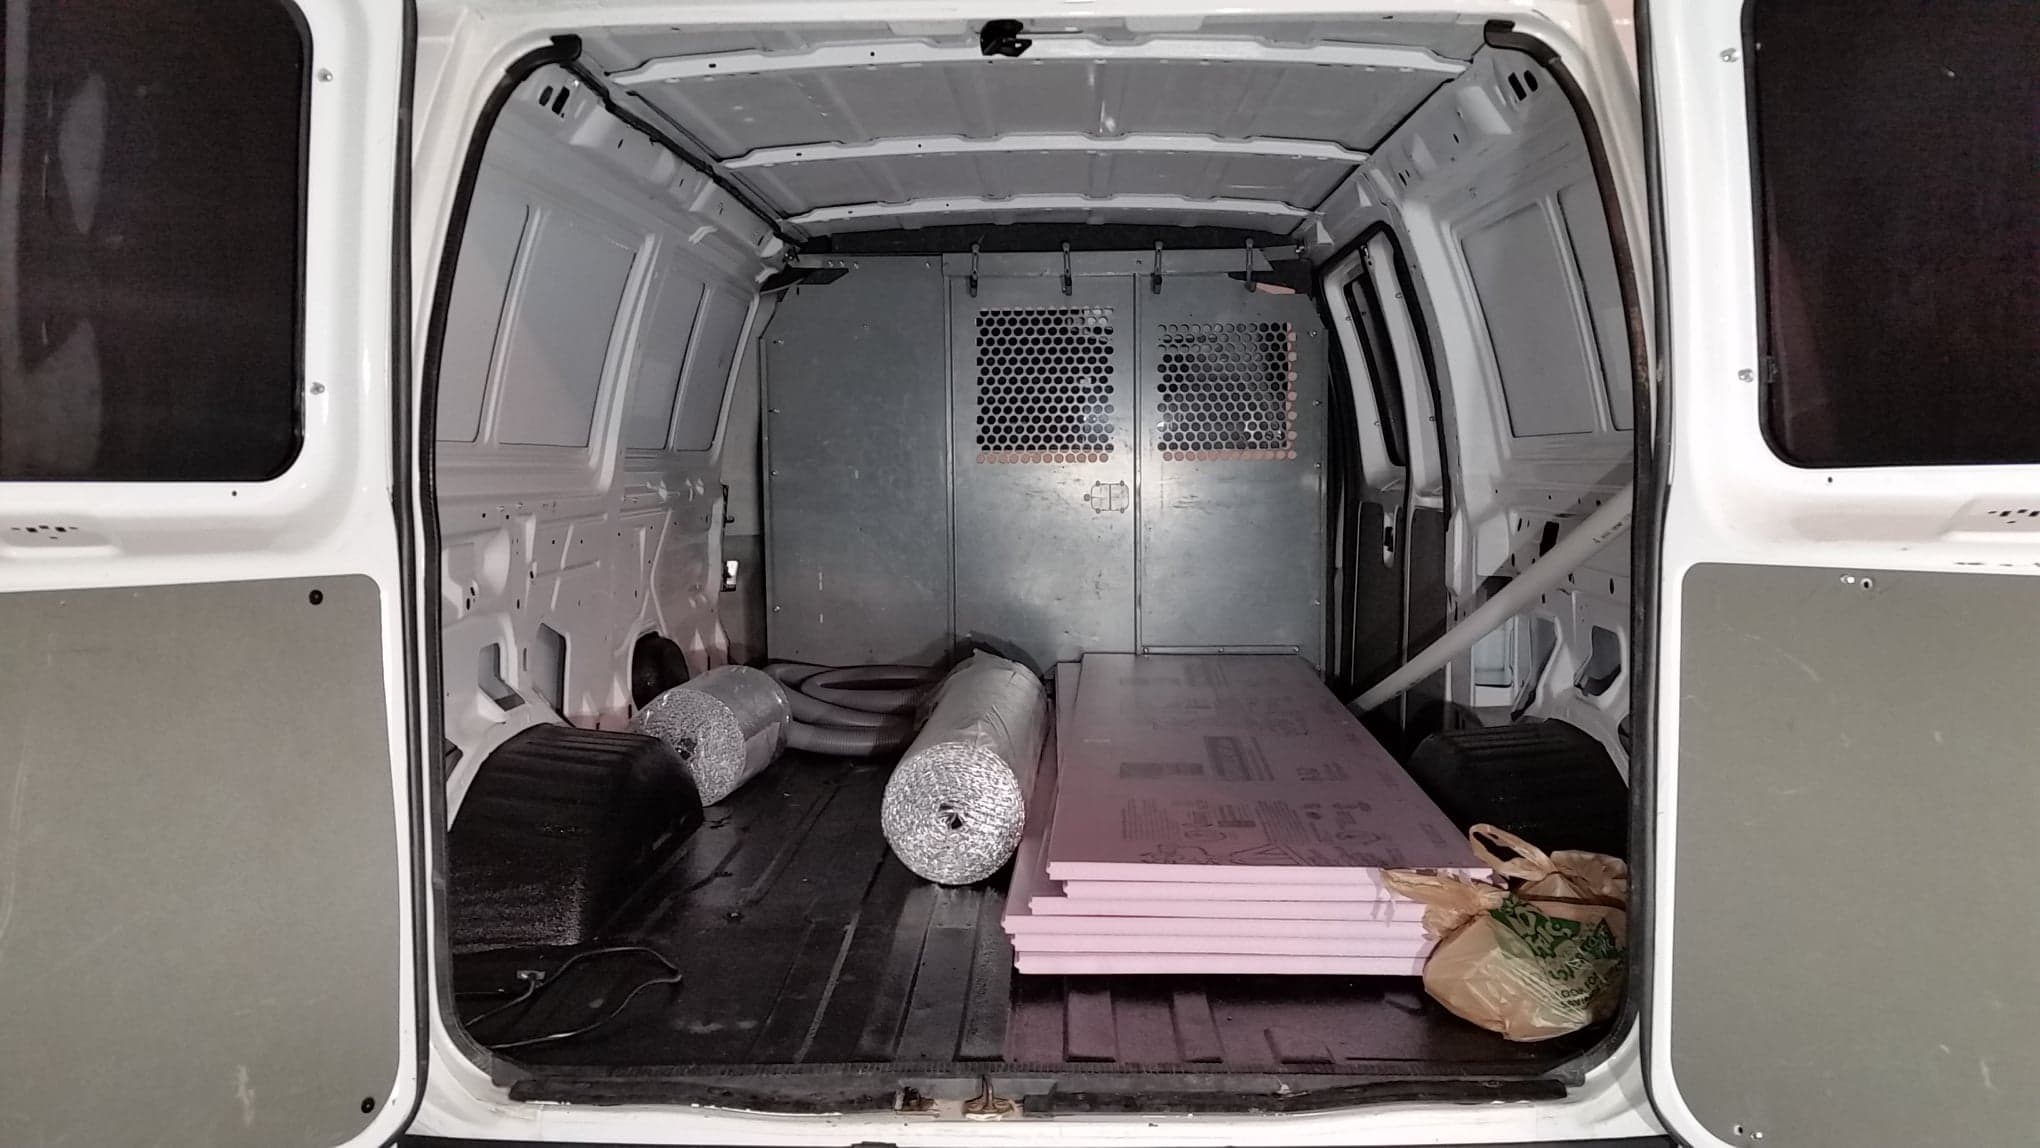
Supplies ready to go.
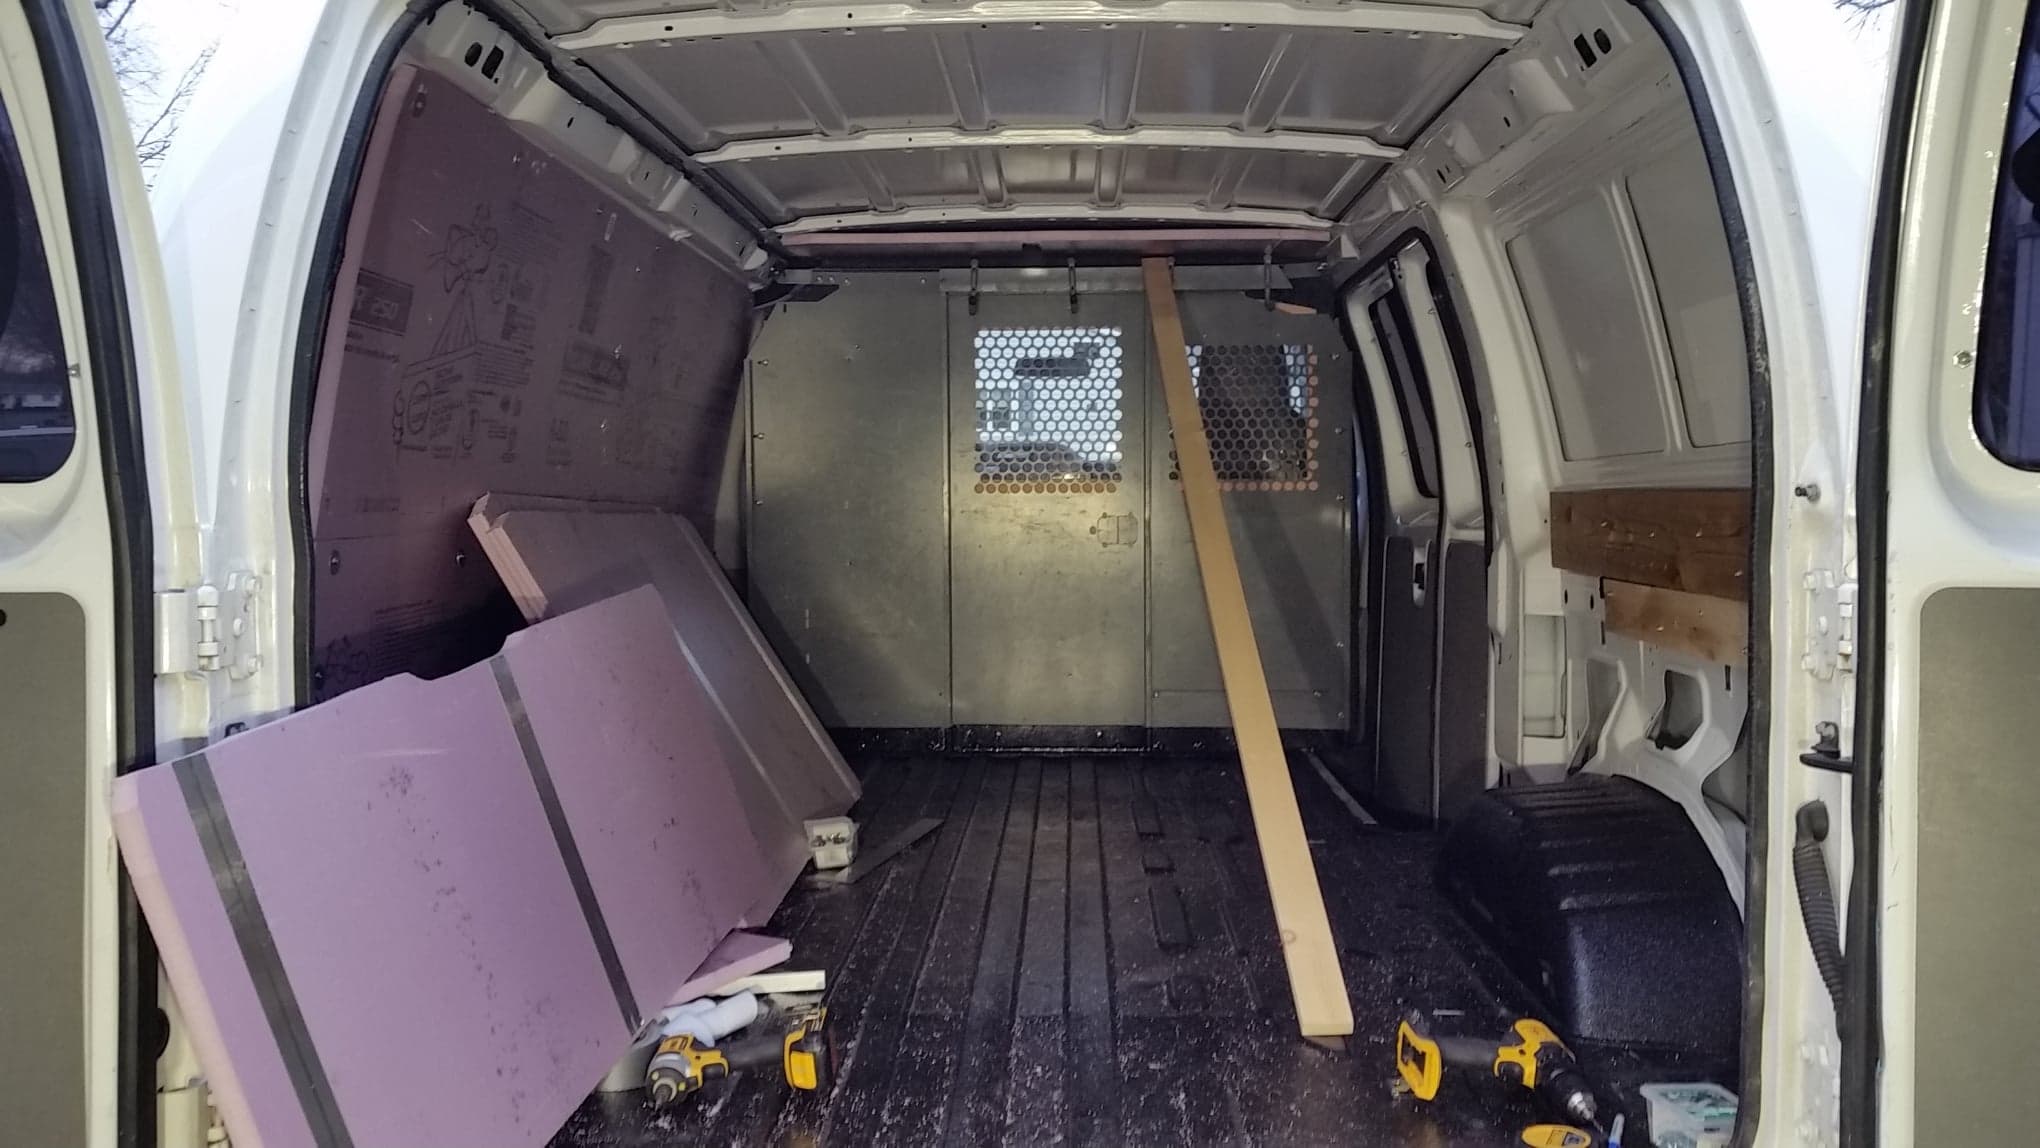
Cutting foam board to fit the contours. Held in place with self tapping screws and washers screwed into the supports, be careful not to puncture the wall of the van.
Used 1x4 boards to hold ceiling boards in place.
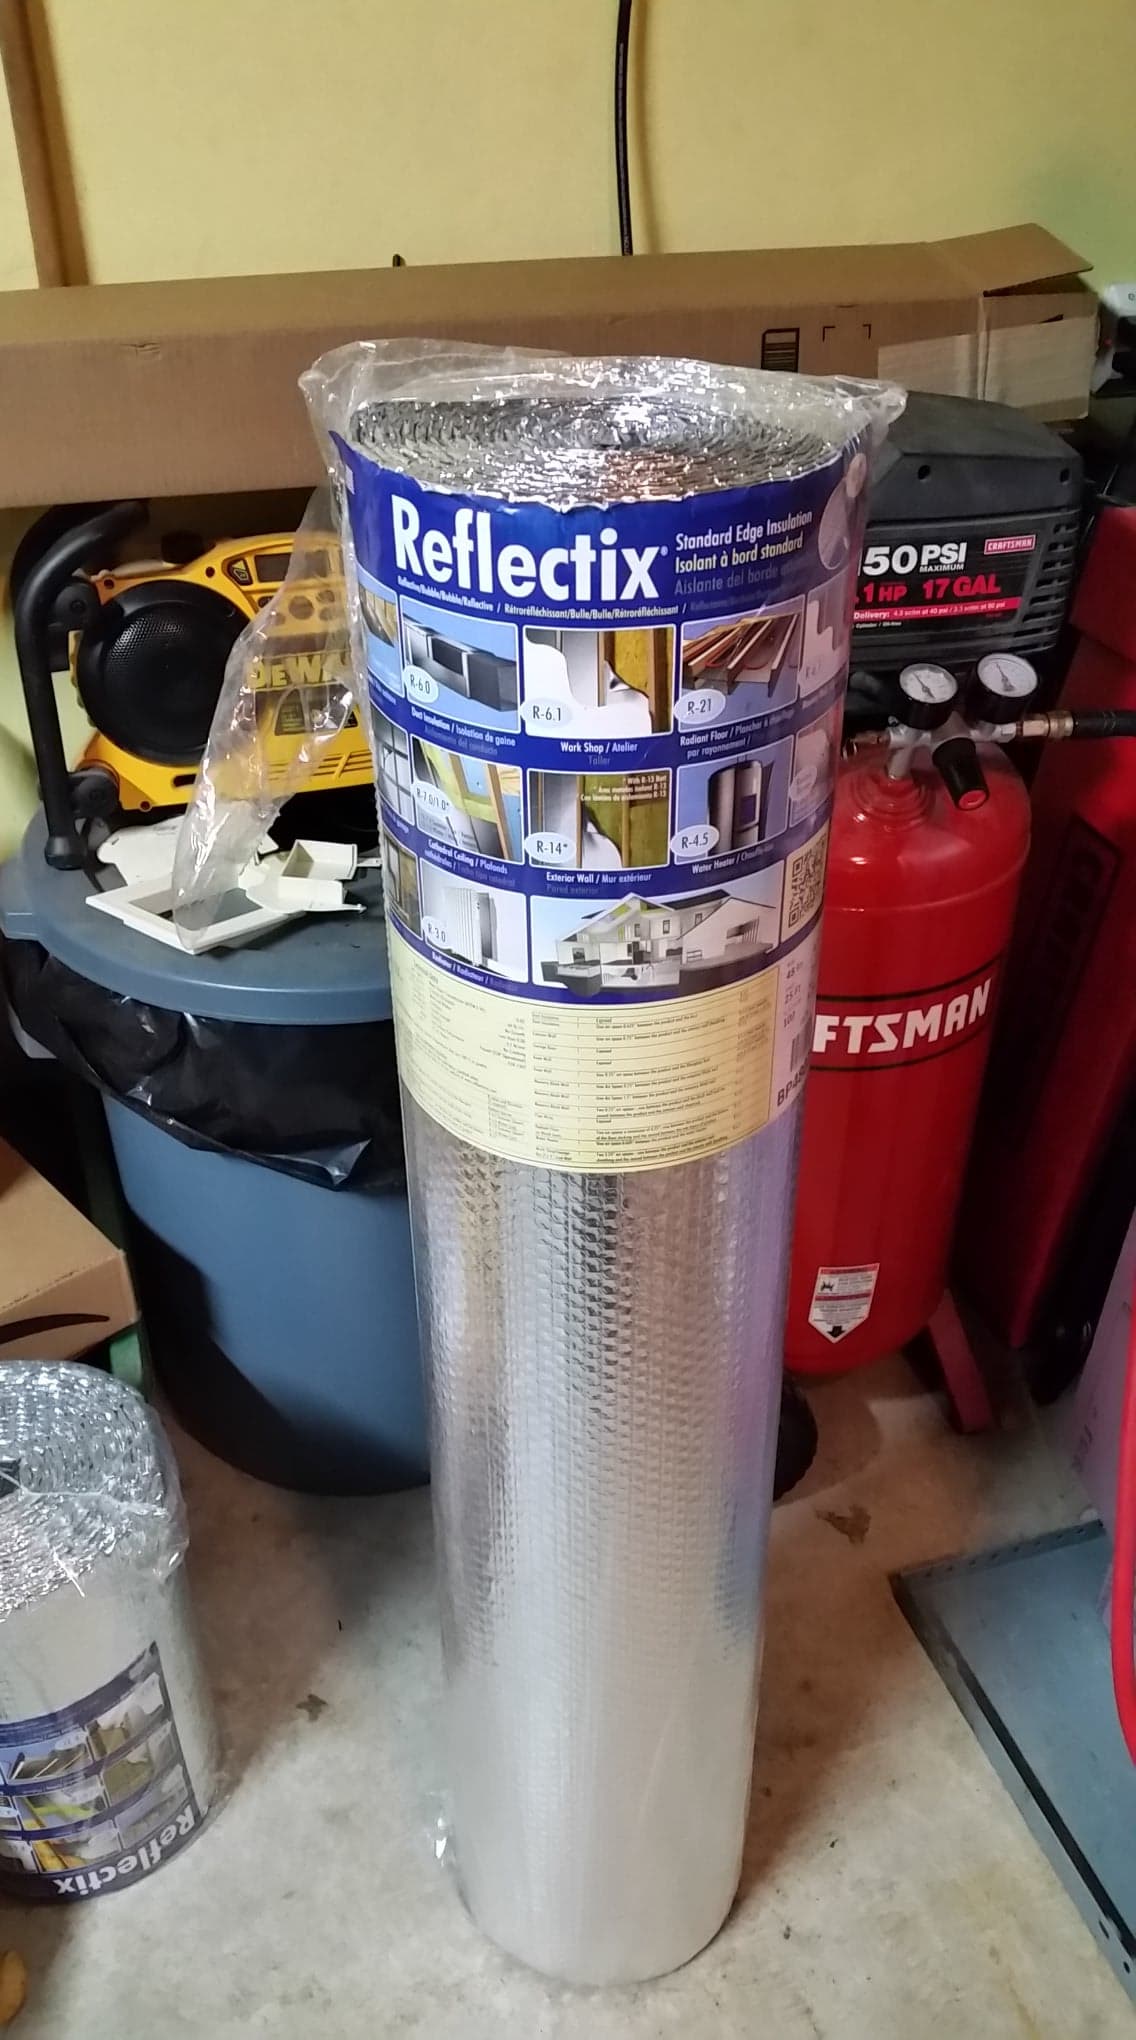
After adding the foam board, I covered with Reflectix, used 3M Spray Adhesive and some screws with large washers to hold in place.
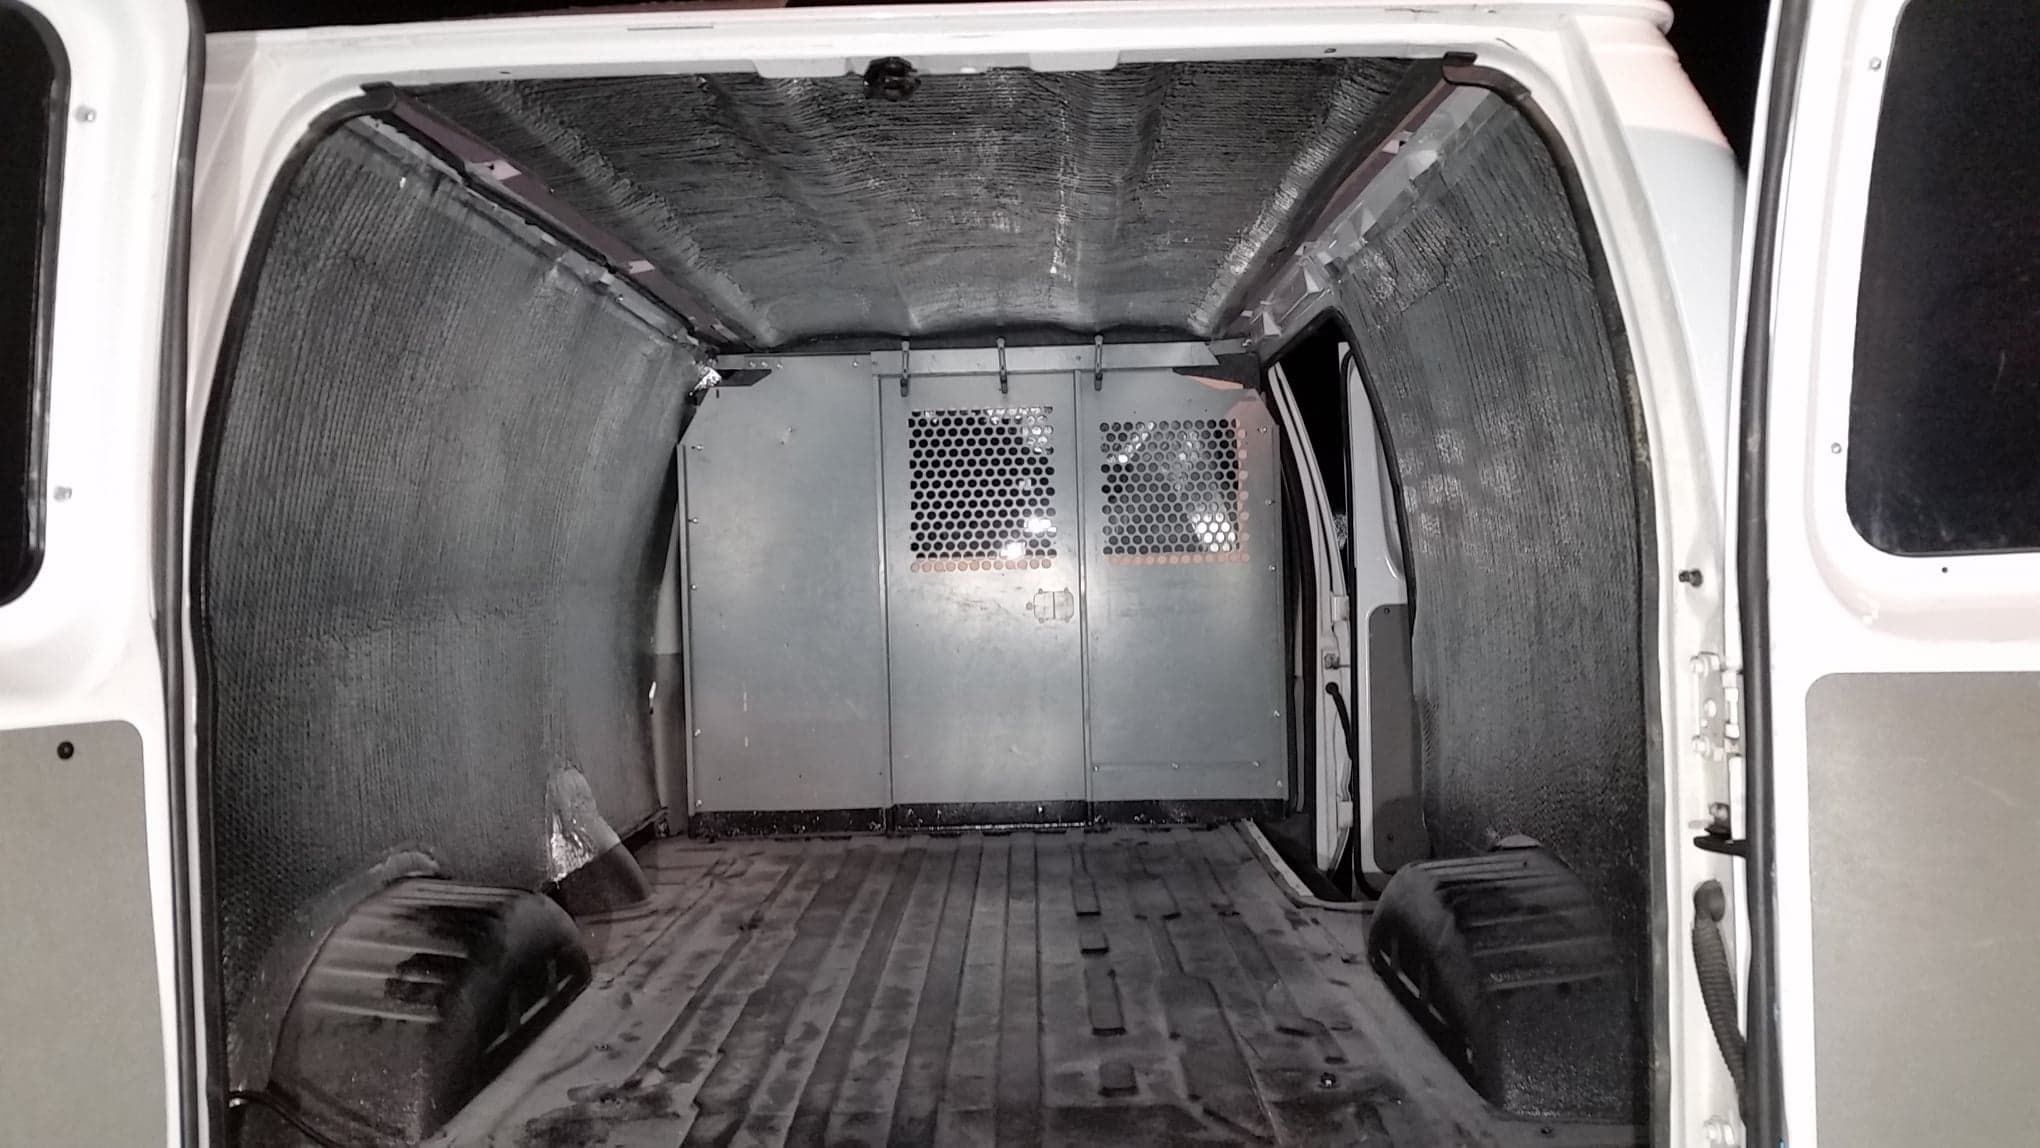
After Installation.
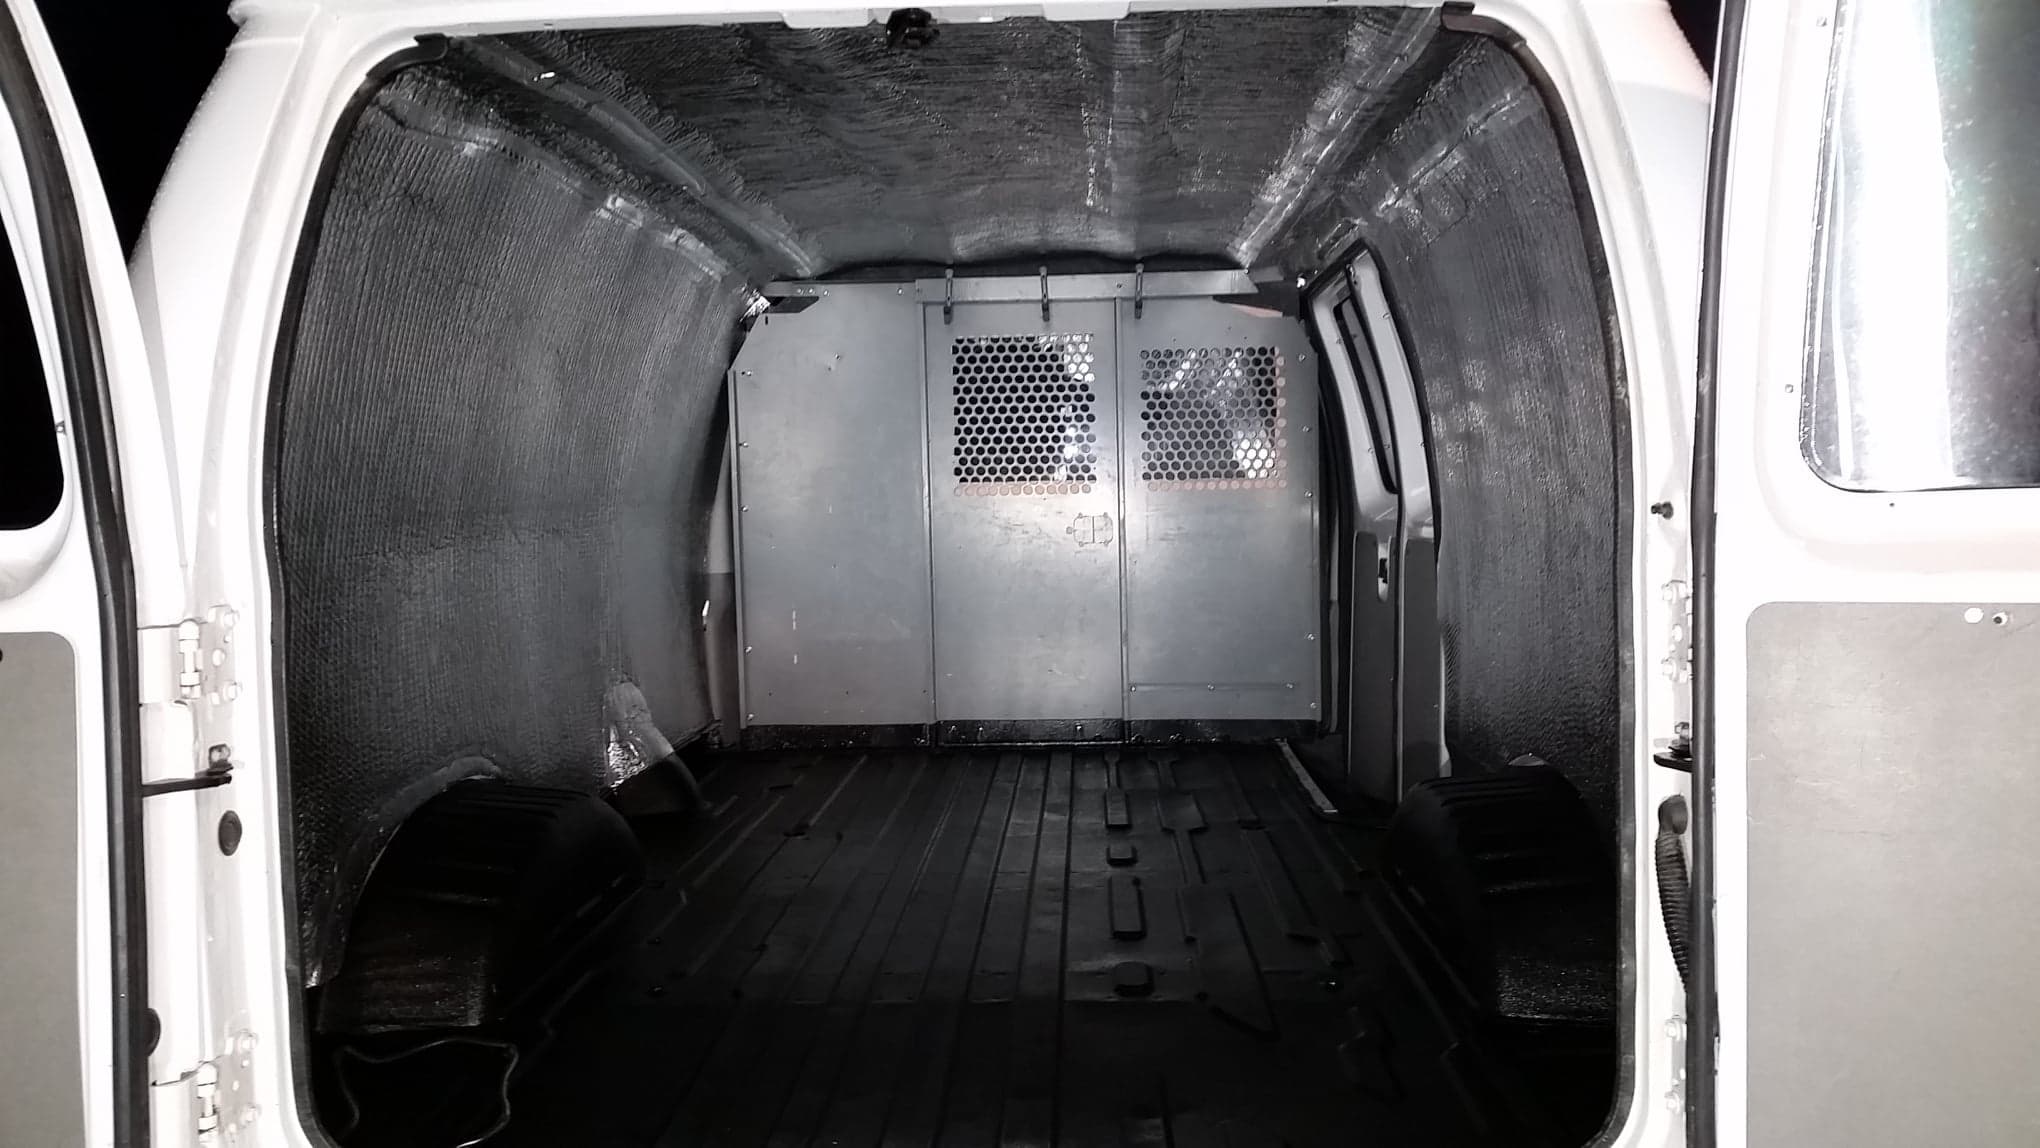
Cleaned and ready for the truckmount install!!!